Saturday, October 17, 2015

MAKE A CHILD HAPPY, DONATE YOUR UNUSED ARTS AND CRAFTS ITEMS TO A GOOD HOME

For three months I've been gathering craft items in my dining room.  I also had a box full of ear warmers, hand made slippers and knitted scarves.  The top picture is of the 12 small afghans I made in the last 3 months.  I have a friend who teaches art to homeless and abused children, seniors with disabilities and Alzheimer's and she also helps the Phoenix Children's Hospital with their Beads of Courage program.  Three of my friends (Lupe, Carol and Evelyn) also brought a ton of items over for her to help with her art classes.  Many of the government programs and schools don't get funding for art classes or that is the first thing that is cut so she was thrilled to get all the things we've been collecting for her.  I had a box full of needles and thread and DMC thread.  She said how happy she was to have that because she was teaching the kids how to sew.  They had no idea how to sew a button on if it came off.  The simple things we all take for granted are a challenge to some of these kids whose parents never taught them how to do these kinds of things.
She also told me, the Boy's and Girl's Clubs don't always have funding for arts and crafts and neither do some of the schools.  If you have yarn, pipe cleaners, colored pencils, paper, thread, buttons, sea shells, cigar boxes, beads, paint, crayons, paint brushes, art books, containers, cord, etc.  Call your local Boy's and Girl's Club or a shelter or a school near you and see if you can donate these items.  It was great for me.  It made me clean out my studio.  Even the nursing homes do art classes and might want some of your craft items.


I haven't done beading with Delica beads in a long time because of the problems with my arms and shoulders.  I met a physicians assistant at my pain management doctor's office and she has been incredible getting me back on the road and without pain.  She loves earrings so I made her American flag earrings and a bracelet and these Halloween earrings.  My problem is Buster keeps trying to take my Fireline thread.  I bought some K.O. beading thread and I really like using it with Delicas, it's very smooth.  He hasn't tried to take that yet but I'm sure the day is coming.

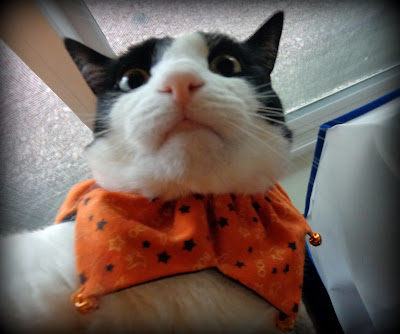
I put his Halloween collar on him that I bought him when he was baby.  This is the look I got.  The eyes mean the aliens are here.  I'm sure he will hide that like he did with collar he came home from the shelter with.


Tuesday, October 6, 2015

LANAH'S WOLF

A few weeks ago I posted pictures of things that I sent to my great nieces and nephews (ages 7 to 13).  It was called Dragon Skin tutorial from Sculpey.  You have to understand that I've been doing clay for 12 years and it's something that I love. This past summer has been a bummer.  I got spasms in my back so bad I couldn't move my legs, had surgery on my shoulder on my right arm and then my left arm started doing the same thing with the pain and then had to have a cyst removed.  My interest in doing clay was slim and none.  I'm whining but I'm done now.

 I sent the key chains and pens to my nieces and nephews and got a request to make either a llama or wolf for one of their friends.  I was going to call them and say "sorry, I don't do llamas or wolves".  Then I saw a picture and the light bulb went on.  It's been a long time since I've done an image transfer on clay and not all of them turned out real well until I bought Lynda Moseley's tutorial on how to do image transfers.  I bought a digital download from Etsy that had beautiful pictures of wolves on it.  Lucky for me Lynda talked me into buying a laser printer when I bought her tutorial.  The other thing I found is that Cannon matte photo paper works really good with transfers.  So, here is my wolf.
I also found in my stash an alphabet mold that I never used so I thought I would make Lanah a letter charm for her key ring.  I believe this is a winter wolf and I really like him.


A couple years ago I printed out some pictures that I was going to transfer so I thought I would try them since I had all the clay out and was feeling better.  The first one I did was the kitten and I thought I picked up the bottle of water but NO, I picked up the bottle of rubbing alcohol so this came out a little light but I didn't want to throw it away.

All these pieces have Magic Glos on them.  I found the best thing to do with transfers is, put one coat of Magic Glos or resin on them before you sand and buff the sides and back and then put your second coat of resin on.  This will protect your image.  I'm going to try the cat one again because he reminds me of Buster.  With all this research on image transfers I also found something interesting about the use of E6000.  Don't care for the smell of that and sometimes I didn't think it bonded metal bail with polymer very well.  I was doing it wrong.  You have to put a little E6000 on the bail and a tiny bit on the pendant and let them sit and get tacky for a little while before you put the two together.  I love the winter scene and it has sparkles in it when you see it up close.  And that is as close to snow as I want to get.

I was told that it's best to use new printed sheets to do transfers but the piece on the left was printed out two years ago and it came out really bright.

I'm waiting to hear from Lynda as to where her link to the Image Transfer tutorial is and I'll put it in here.


Saturday, September 19, 2015

DRAGON EGG TUTORIAL

It's been a while since I blogged.  Took a road trip for two weeks to see family and when I came home my left arm and shoulder were screwed up and I couldn't do anything.  It's hell to get old and get arthritis.  I've also got tears in the tendons which were painful but went for a shot to help with the pain.  My muse went on vacation too while I was gone but I saw something on the internet that intrigued me.  It was on the Sculpey.com  website and it was called "Dragon Egg Tutorial" by Sherri Kellberg HERE.  I asked my friend Evelyn to come over and told her about this and we decided to try it.  I have a box full of Jone's Tones and Lisa Pavelka foils.  I found the Pavelka foils seemed to work the best and were easier to apply.  My Jone's Tones foils might be old.

The first piece I did which I like the best was thinner and I used a lot of different color foils.

It has Magic Glos on it but I haven't finished it yet because I don't know if I want it to be a pendant or a pin.

A couple others that I did came out thicker because I added too much backing and then decided to put cut pieces around the outside.

This was one of the sheets that I did with a bunch of pieces of different foils.


Here are two of the thicker pieces that I did.  I wasn't sure what to do with them so I put Magic Glos and rub ons on them and made key chains out of them.  The pen on the left was suppose to be a kitten but by the time I got done it looked more like a Wookie from Star Wars.  These have all been sent to my great nieces and nephews.

These are the rest of the pieces that I did.


The piece on the top right does not have resin on it.  It was a left over piece that I used Penni Jo Couch's new innie swirl texture mat on it.  Best Flexible Molds Texture Sheets.  I coated it with Future and baked it again at 200 degrees for 30 minutes.  The bottom left was all the pieces left after cutting the hearts and teardrops out.


This picture doesn't do much because of all the shiny foil and the resin but I think I like this piece the best.  I think they are all too thick to be used as pendants but some people like them that way.  I'll probably make key chains out of them.  We were going to try this with a different cutter but didn't get a chance yet.  I would suggest trying parts of circle cutters and different shapes and putting them together.  I had a couple places on the sheets that the foil didn't stick to so I put Pan Pastel bronze, silver and gold powder on it before I cut it.  Or, you can leave the clay showing.

It's a fun thing to do if you've lost your muse.

If anyone sees my muse out there, would you please tell her to come home.


Saturday, August 8, 2015

WHO LET THE DOGS OUT? CHRISTI FRIESEN DID

I got my new Christi Friesen book today about DOGS.


It's a great book and I read it from cover to cover today.

Well, Christi is having a contest on her facebook page.  If you put up a selfie with her Dog Book, you have an opportunity to win Spike the lump mutt.  I don't do selfies.  I do take a lot of pictures of Buster though so I opened the book and called him.  He came running and stood by the book so I could take his picture.  He can be a ham sometimes.


He doesn't like real dogs but he likes this book and Christi said it was OK to put his picture up with the book.

Speaking of dogs.  I got a new sewing machine so the first thing I did was make bandanas for Beau and Champ.
Beau


Champ

My husband laughed and wanted to know if that's why I bought the new machine so I could make dog bandanas.  Absolutely.
I walk these two every morning for a friend of mine.  This morning we had a scare and my blood pressure shot up.  We were a block from her house and there were 3 coyotes walking up the street toward us.  I grabbed them and we hid in the bushes but they saw me.  One came walking toward us and the dogs started barking like crazy at it and it ran away.  Then another one came and they did the same thing and he ran away.  Champ thinks he is a German Shepherd.  They have no fear.  I had to go home and change my underwear.  When I see them in packs I get scared.  I wear a whistle just in case but I didn't need it today.  That little guy would be no match for a coyote.  Now I have to make more bandanas for my niece and nephew's dogs so says my sister.


Monday, July 20, 2015

Pebeo Challenge and Some Extra Stuff

My friend Judy called and said she bought some Pebeo paints and would I show her how to use them.  So, she came over Friday with her Pebeo Prsime paints and some old polymer clay pieces that she didn't like and wanted to do something with them.  Well, they were curved on the top so we had a challenge.  I took out a 2 inch by 2 inch piece of glass and showed her how I put the paint on.
This is the first time I've done this on glass.  I gave this to Judy so I don't know how it acted as it was drying.

 These are the two pendants Judy brought over that she put Pebeo on.  I'm hoping I'll get a chance to take a picture of them when they are dry.

EXTRUDER DEMO

This past Saturday I was suppose to do a demo at our clay guild meeting but I wasn't able to go.  For a week I worked making things to take prior to the demo.  I love doing the Randee Ketzel Crazy Heart Tutorial and I did a bunch of those just to show at the meeting.


A friend asked if she could take my pieces to the meeting even though I couldn't go.  Some I didn't even finish sanding and buffing.  The two on the bottom left are pieces that I've been doing for 10 years and the other 3 are made from Randee's tutorial.  I'll post pictures of the other ones when I finish them.  I used the new Premo gold and silver glitter in some of them and the results were stunning.


DESTASH

For 4 years I made polymer clay pendants that I sold at a local bead store.  I really enjoyed the opportunity and the extra money.  Unfortunately, they had to close on short notice.  I was in the process of making pendants and some of them were from Lynda Moseley's tutorial "Masterful Faux Made Easy" Masterful Faux Made Easy.  Well, I have almost 200 pieces of different pendants that aren't finished and I would like to sell them so I put them up on Etsy  Destash along with other pieces.


Pendant Pieces  14 pieces in total.


These are also in my Etsy shop.

The bottom ones have resin on them and top pieces have been sanded and buffed but you could sand and buff them more.